
Amazon AWS is one of the most widely used deployment service. Other alternative that we generally use is Heroku. Heroku is also a good choice for deploying your rails application, it is very quick. You can get your app deployed like in less than 5 minutes using Heroku. We use Heroku as staging env for most of our applications and AWS for customer testing and production.

Today I will explain in details how one can deploy rails app using Amazon AWS. Considering that you have a working Rails application that you want to deploy on AWS.
Step 1
Create account on Amazon AWS. You need to have an account on AWS, it can be created for free. One can use amazon AWS for free for one year\”, here are the details of the free plan.
Step 2
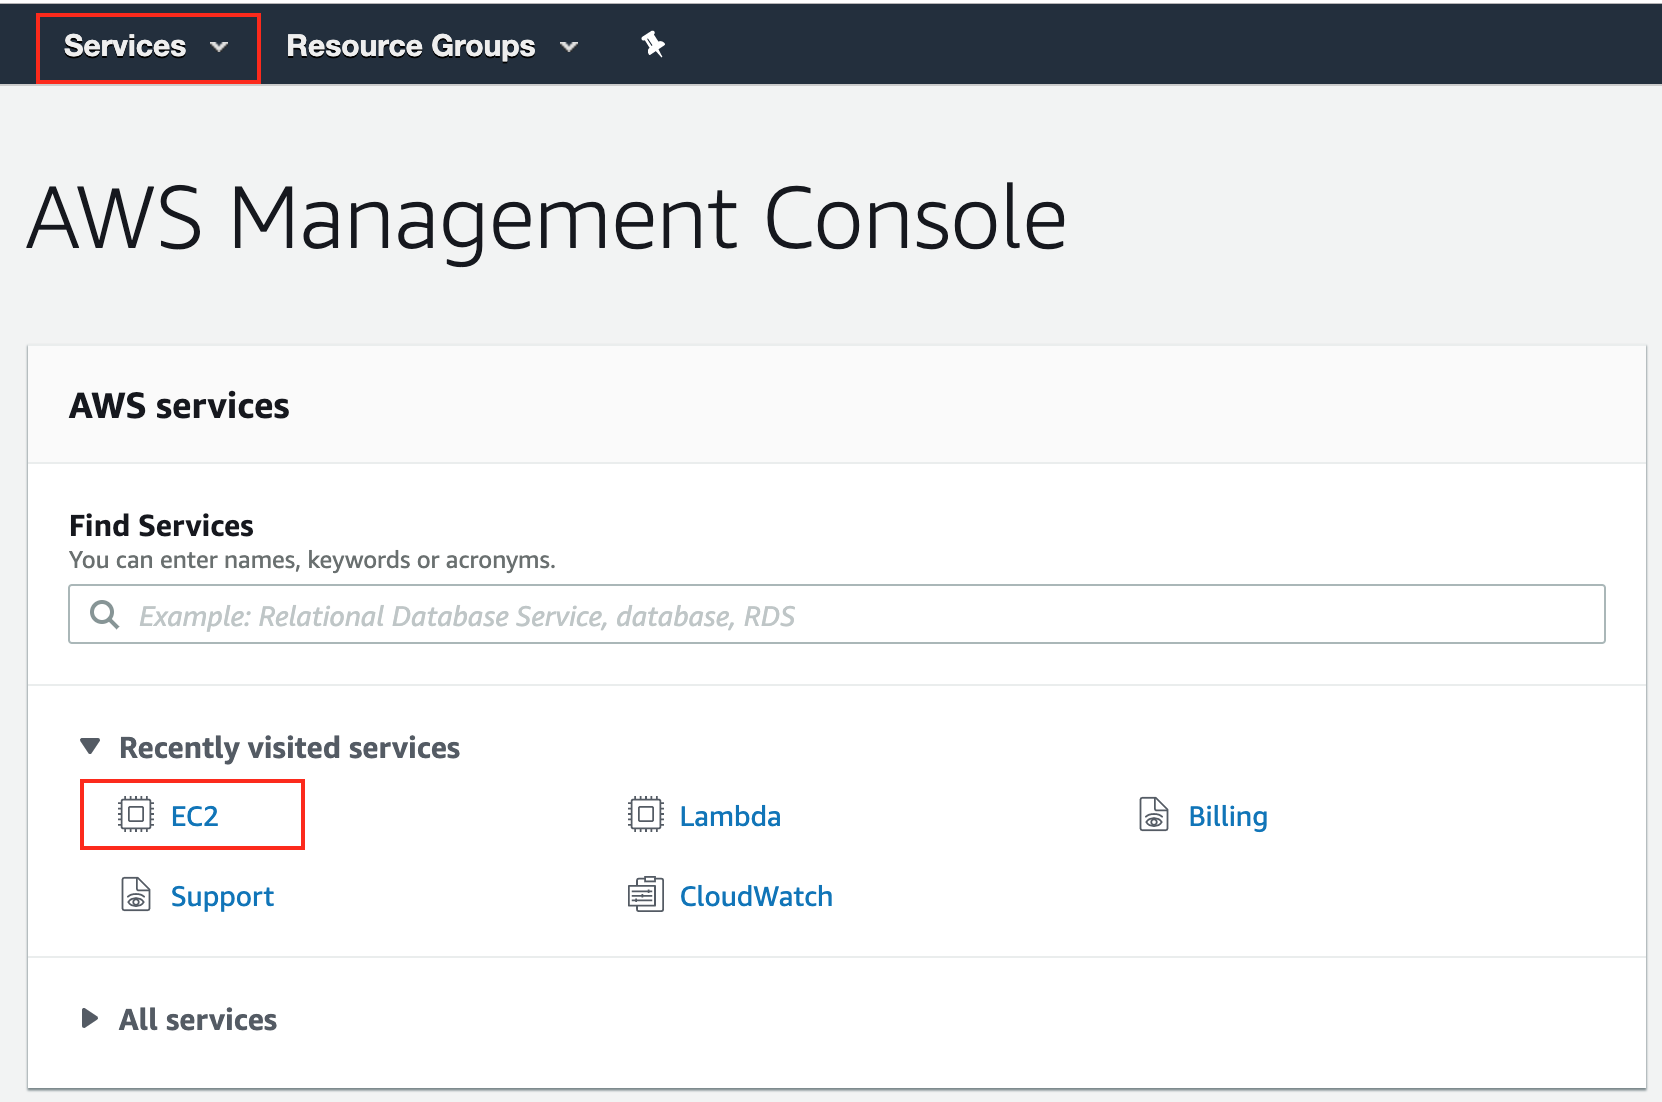
Once logged in, next step is to create an instance. You will find the option to create new instance inside the option EC2. EC2 will also be available inside services menus location on top left corner.
Selecte options to select EC2 from AWS dashboard.
Step 3
Inside EC2, you will see list of the already running instances, if there are any. To launch a new instance, there is option 'launch instance' as shown in the screenshot below.
Select Launch Instance Button.

Step 4
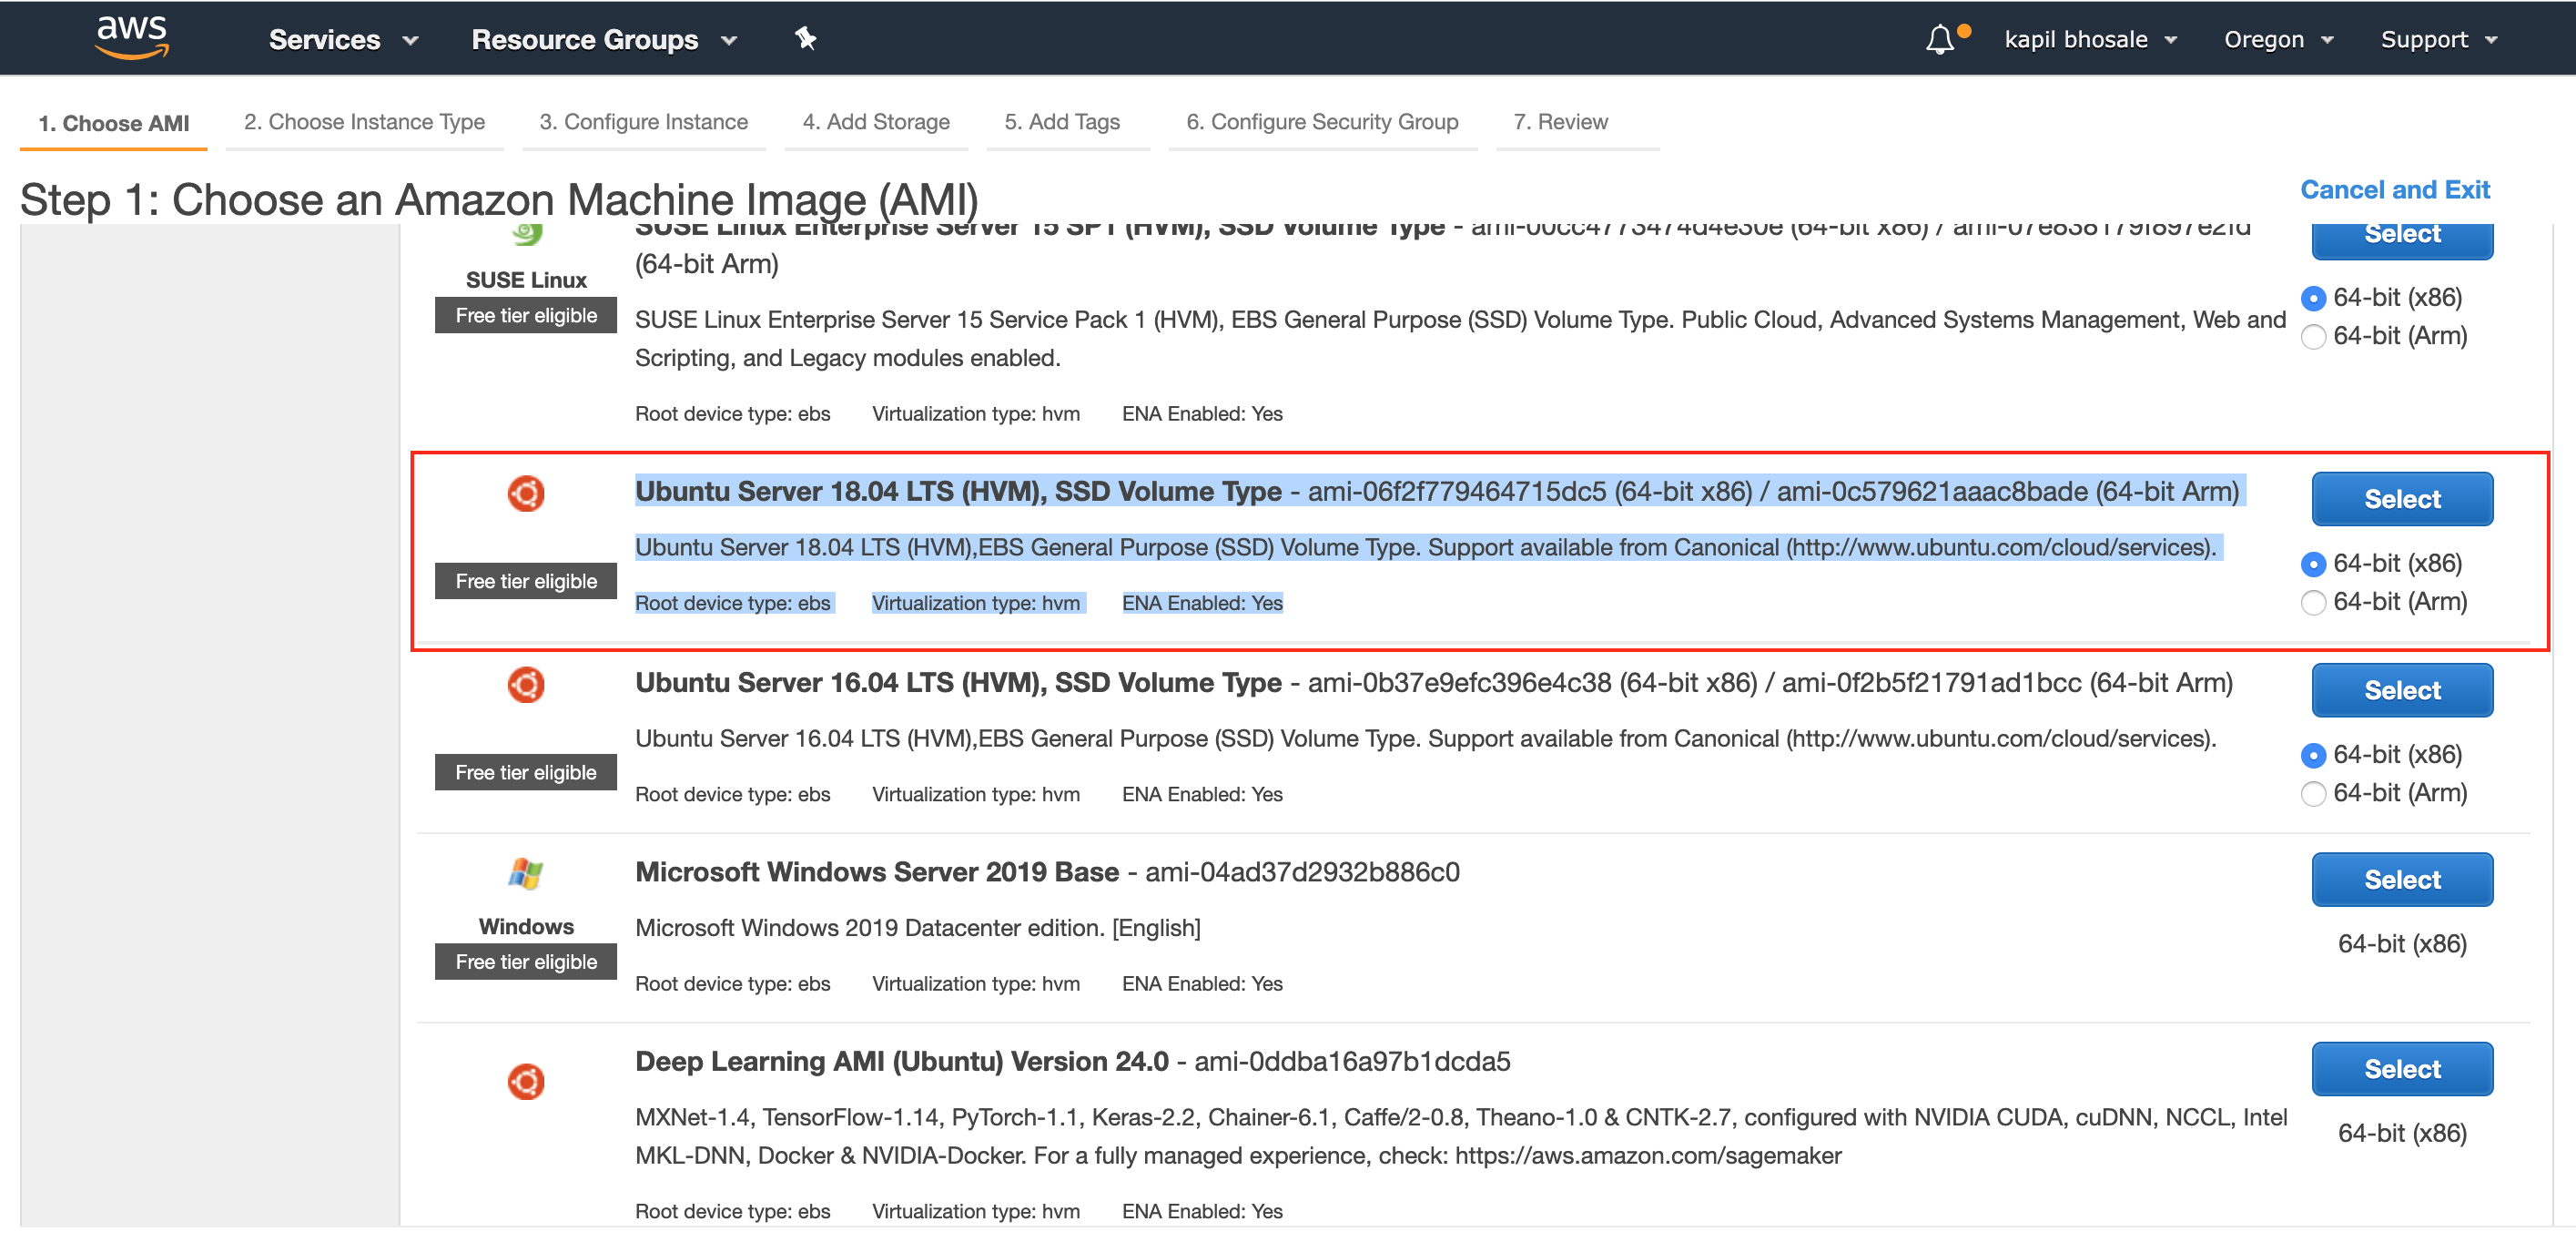
Next step is to select the instance type. There are multiple versions of Machine images available, some of them are eligible for free tier usage i.e. the one year free plan described earlier in step 2. One can either use Amazon Linux for Ubuntu. We prefer to use Ubuntu with latest stable LTS version. In this case the Ubuntu Server 18.04 LTLD is selected. Depending on Latest releases of LTS this version might change.
Choose instance type.
Step 5
In this step you need to specify the type of compute instance. You need to choose the instance with CPUs and memory etc. As the instance type t2.micro is only eligible for free tier usage, we proceed with this selection. Depending on your requirement you can decide what instance to choose for your Rails application.
Select type of instance based on cpu and memory
Step 6
Till this step the instance configuration were kind of general one. In this step you need to configure the Security Group for the instance. If you did not modify this section then default security group will be applied. The only rule that is defined in default security group is ssh - port 22. We can add other Input ports of this instance those that are available for access.
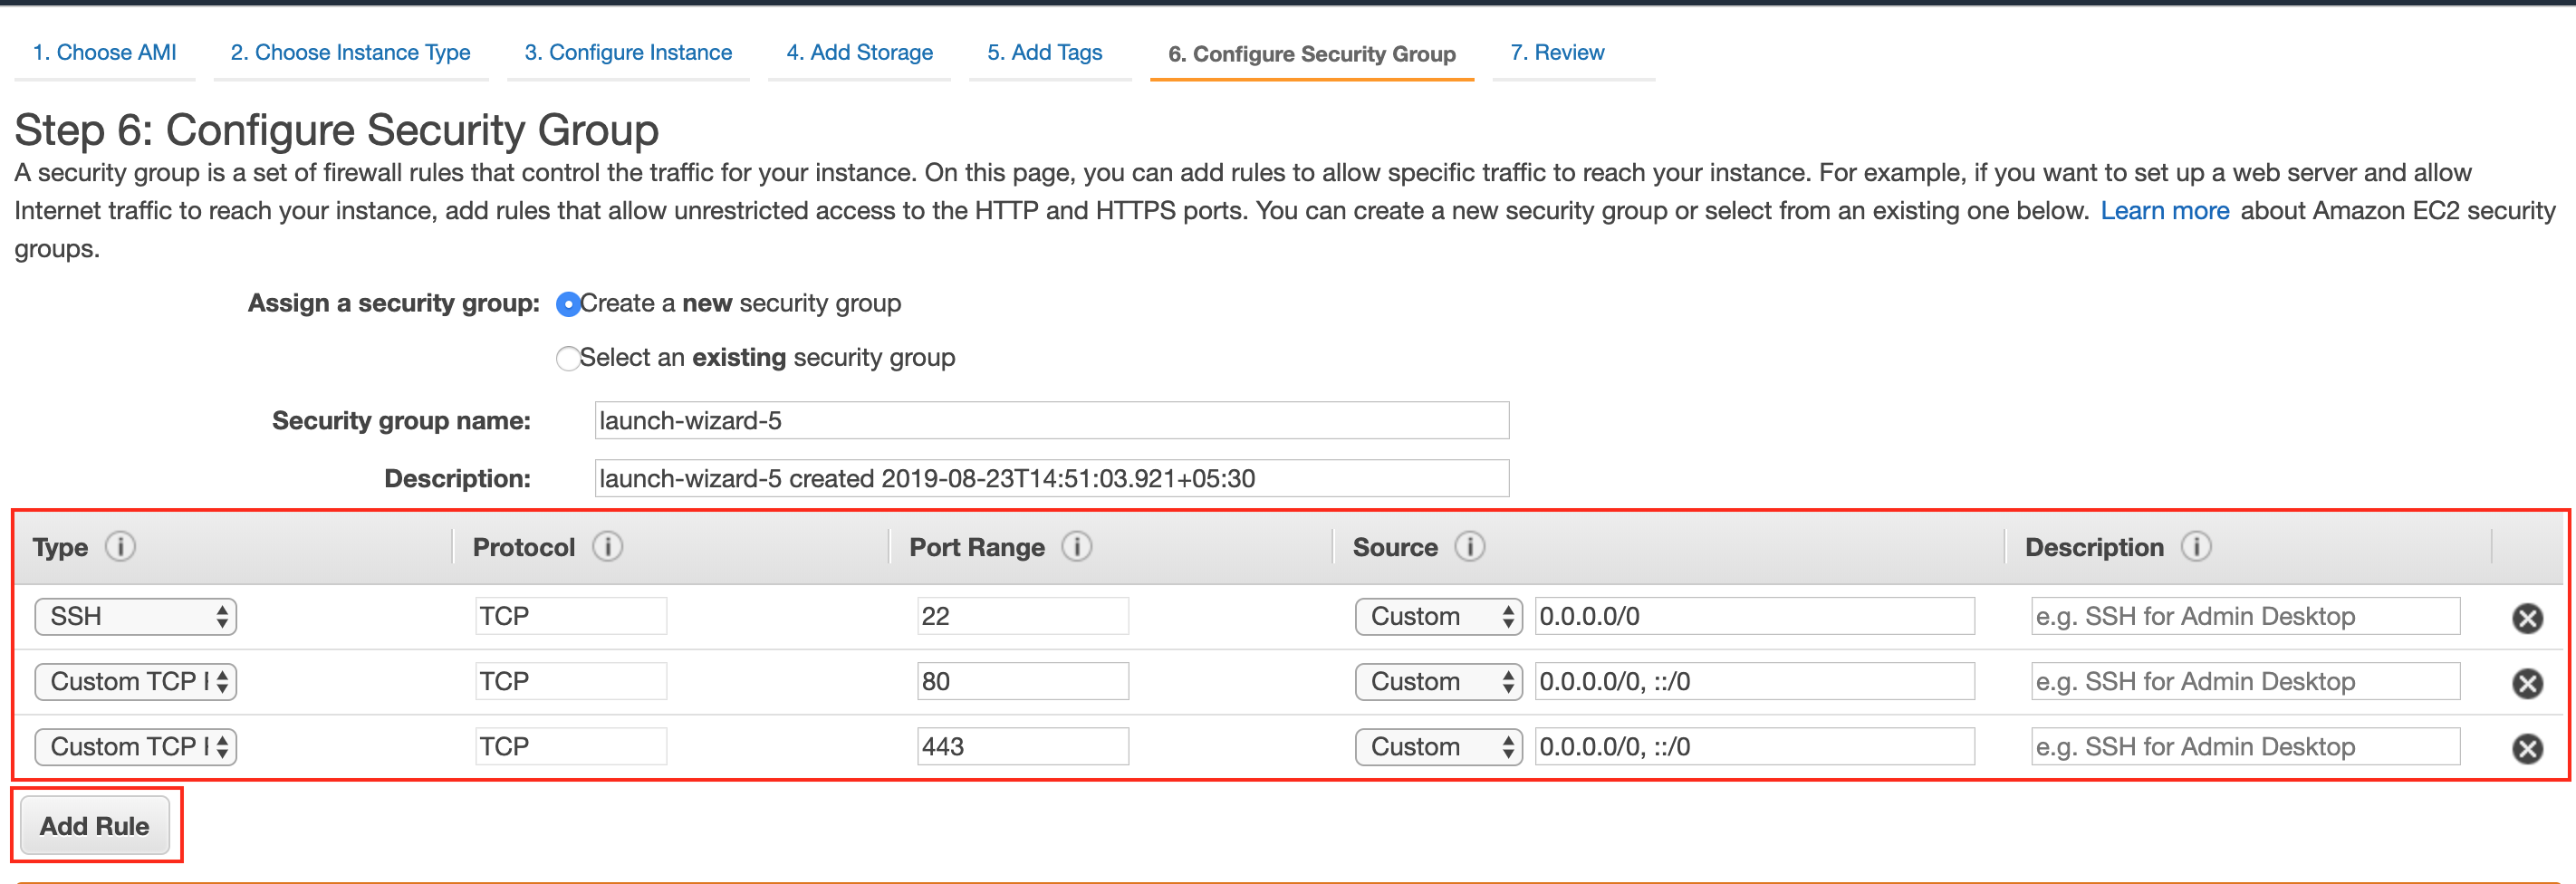
In most of the cases, the rails application running on AWS will need following three ports to be accessed.
- ssh – port no 22
- TCP http port – 80
- TCP https port – 443
So will be adding these rules, if your application is intended to be accessed from particular IP addresses that can be configured in this step. Let's say you are developing some app and it should be accessible inside some private networks then you need to define the source IP addresses in this step.
Configure Security Rules for the instance.
Step 7
The default instance will come with 8GB of SSD memory, you can add more memory in this step.
Note: If you are planning to use on Disk Database, you might need more memory. Ohh what do I mean by on disk DB? There are multiple options you can use for database, such as
Amazon RDS (Relational Data Source) Install DB on the EC2 container and use the same DB. So, if you are planning to use the second option, think of increasing the disk space.
Add / update the storage available for the instance. Once these steps are done. Click on Launch button at the bottom of these configuration tabs.

Step 8
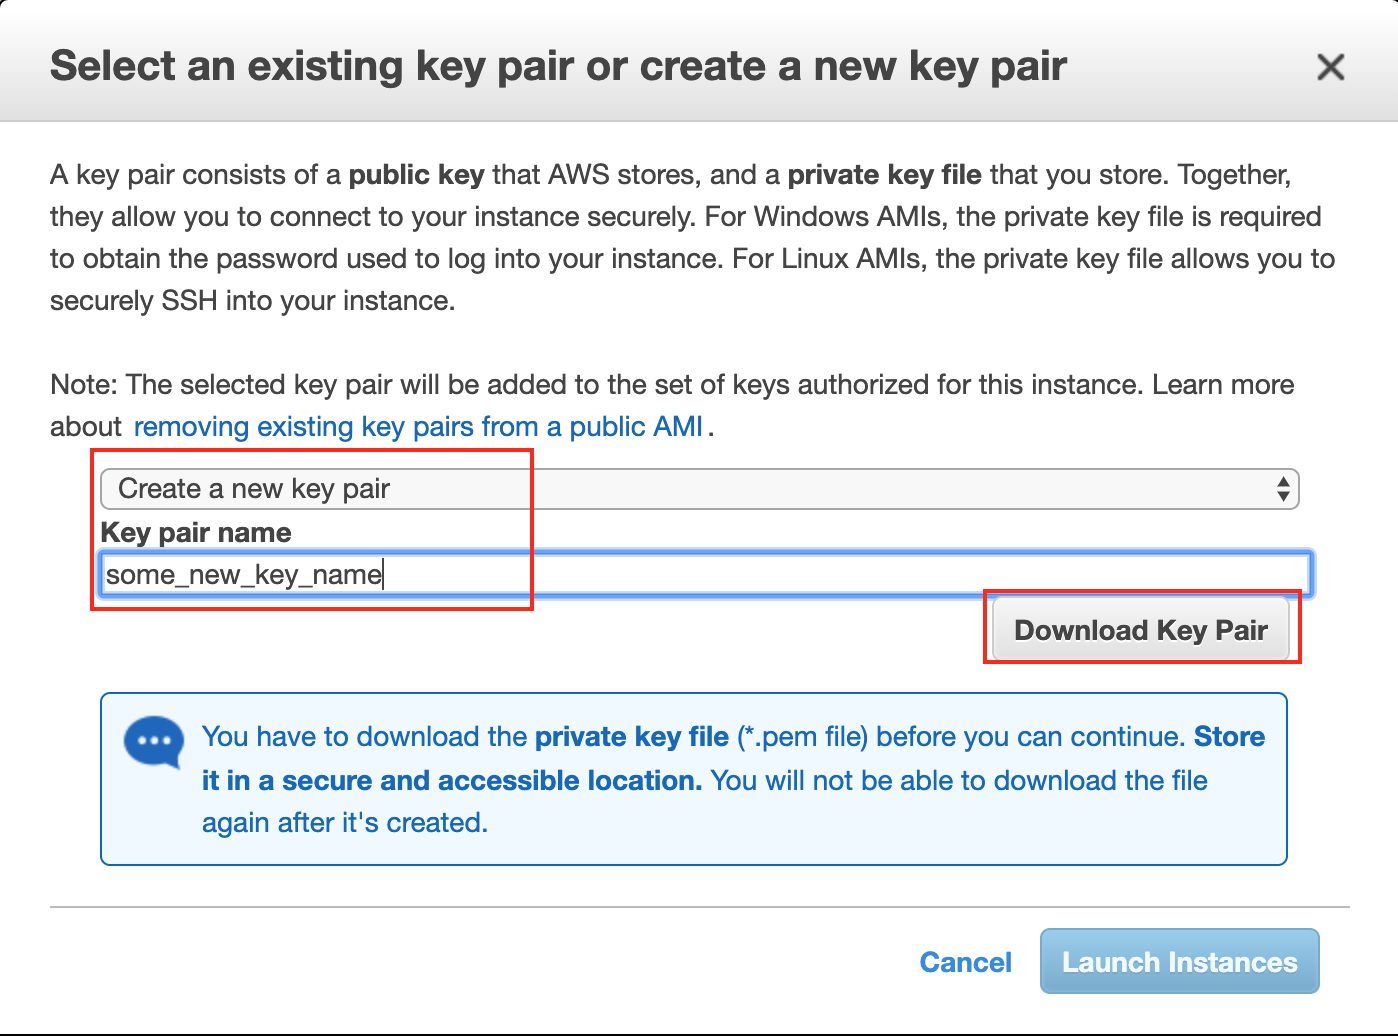
While launching the instance, AWS will ask to select the existing key pair or to create new one. This key is used while doing ssh to the instance. REMEMBER – If you don\’t have this key, you might not be able to login to the console of this instance. We choose to create new key pair, specify the name and download the key pair & store it at some secure location. Click on 'Launch Instance'.
Download the private key pair for the instance.
Step 9
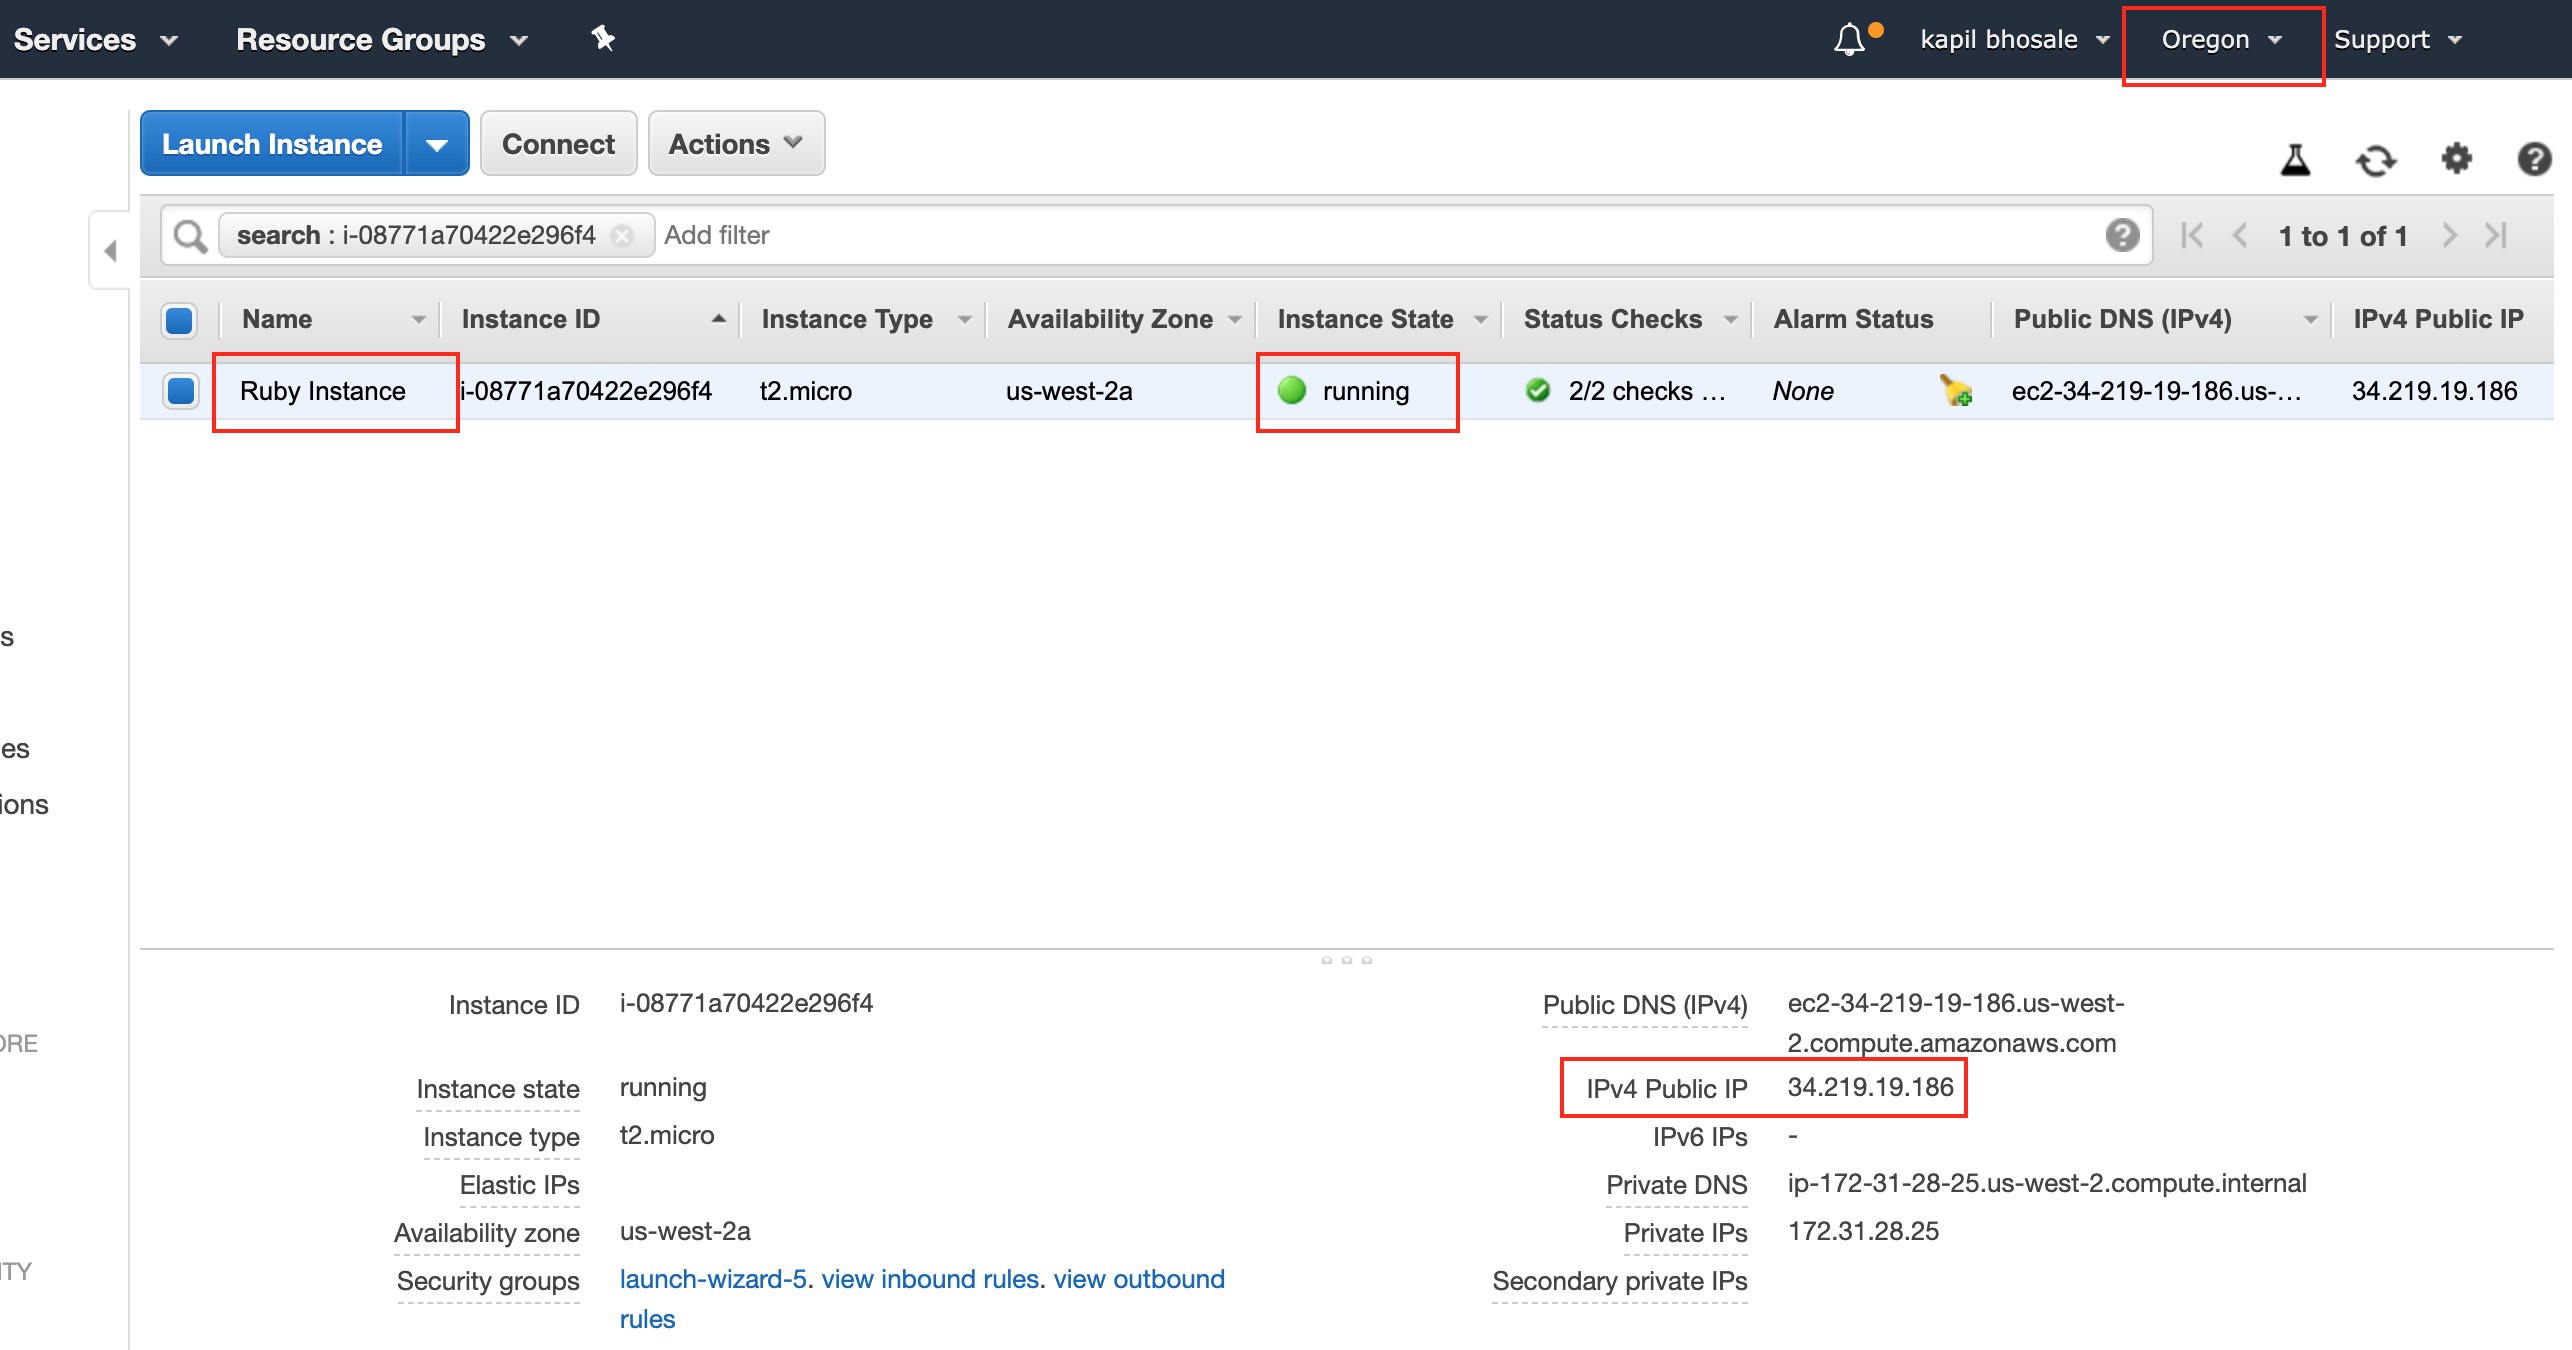
After these all steps, the instance will be visible under EC2 instances list. REMEMBER – the list of instances is per region. You can see the current region on the top right corner of the AWS dashboard, besides login user name as shown in the screenshot below.
Name the instance, as we named it as Ruby Instance. Once the Instance state is running. You can ssh to this instance and configure the further details of the Rails application. Note down the Public IP address of the instance.
All configurations are done now 🙂, as far as EC2 configs are considered.
Step 10
SSH to the instance – change file permissions of the private key downloaded as per step 8. You need to set the file permissions to 600, which means you can read and write the file or directory and other users have no access to it.
sudo chmod 600 ~/Downloads/some_new_key_name.pem
Step 11
Use the private key to ssh to the instance, with public IP of the instance. Here in this case, 34.219.19.186 is IP of the sample instance we created. Replace it with your instance\’s public IP address. You also need to specify the private key with -i option.
ssh ubuntu@34.219.19.186 -i ~/Downloads/some_new_key_name.pem
Step 12
You can also get the keyless access to the instance. To do so, copy your public key.
cat ~/.ssh/id_rsa.pub | pbcopy
Login to the instance. Modify ~/.ssh/authorized_keys, add your public key to this file. You will not need pem key for next ssh logins. This feature can also be used to provide access to this instance. Add other users public key to the ~/.ssh/authorized_keys and they will have ssh access to the instance, they don\’t need private key.
Once logged inside the container. It is recommended to update the packages.
sudo apt-get update
Your instance is now ready to be configured for Ruby & Rails, finally :).
Let's Configure the Instance for Rails in the next article in this series.